So, you’re ready to go kayaking, but you have a vehicle without a roof rack. What do you do? You don’t need a dedicated roof rack to transport your kayak, so take a look at our guide to find out which DIY and paid options you can use.
If you have a vehicle that doesn’t have crossbars or a roof rack system, you may think you’re out of luck when it comes to transporting your kayak to a nearby body of water. Fortunately, this isn’t the case! There are several ways to transport your favorite one-person watercraft without a functional rack. In this guide, we’re going to show you exactly how to secure your kayak to your vehicle, even if it’s a 14-foot touring kayak.

Table of Contents
What You Will Need
These systems of securing your kayak are relatively simple, but that doesn’t mean that you won’t need dedicated materials. To start, you’re definitely going to require straps for everything you read in this guide, so take a second and buy some if you don’t have them for your kayak. I’m also going to include a DIY option, a paid option, and an expensive option so that you have some choices.
DIY Option
I love this option because it’s very inexpensive; it just takes some ratcheting straps, some rope, and some pool noodles to protect your car. This is also a method that only takes about 20 minutes to use, and it’s also very secure, especially if you use rope to secure the kayak to any hooks or screw holes that you may have on the body of your car or truck.
That being said, this does have its drawbacks. If you ratchet the straps too hard, they can dent your kayak, and pool noodles tend to compress and lose their memory over time, so you may have to replace them down the line.
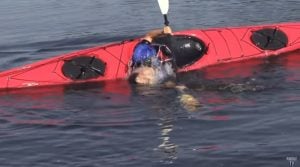
Here’s a video that outlines one way to use pool noodles as a DIY option for securing your kayak.
The first step that you’ll need to follow to secure your kayak to the roof of your vehicle is to cut the pool noodles down to size. This sizing will vary based on the size of your car’s roof, so it’s going to take some measurements. Once cut down to size, you’re going to use your first length of rope to string through the noodles. Once strung, tie them to the roof of your car in the front and back sections and secure them in the middle along the ceiling of the vehicle. You can also tie it to the handles that are on the ceiling inside of the car.
Next, place the kayak atop the noodles upside down. After this is done, use ratcheting straps to secure the kayak to the top of the vehicle. Always making sure only to tie it tight enough so that the kayak doesn’t move. If you tie it too tight, you will dent the body of the vessel. Finally, as a way to add some extra protection and keep the kayak from sliding, you can use some extra rope or string to secure the kayak to any metal loops or vacant screw holes along the front or rear of the vehicle.
Advantages:
- This method is very inexpensive.
- With a good ratcheting strap, your kayak will be very secure.
Disadvantages:
- Pool noodles lose their memory over time, so you’ll need to replace them.
Paid Option
These paid options won’t set you back much, and having them will protect the top of your vehicle and your kayak, and you won’t have to worry about either product losing memory. The first product, which is the HandiRack Universal Inflatable Roof Rack, requires straps for both the racking system and the kayak. Once the system is affixed to your car, you use the included HandiPump to inflate the sections that will come in contact with the kayak. Once attached, it’s effortless to use a second set of straps to secure anything to your roof – not just kayaks.

![]()
This system is straightforward to use and requires no physical racks. It’s also very convenient to remove when not in use, and it takes just the pump to restore the system. If there were a drawback, it tends to collect road debris and dirt between the HandiRack and the roof of your vehicle.
Installing the HandiRack is also a breeze. You simply strap the inflatable sections to the front and back sections of your car or truck, inflate the top portions using the HandiPump, and strap the kayak to your vehicle. The straps have fully adjustable buckles, so it’s merely a matter of tightening the kayak and the rack system so that it’s snug and secure.
Advantages:
- HandiRack comes with a HandiPump for quick inflation.
- These use reliable strapping systems.
Disadvantages:
- Dirt and debris easily are caught between the car and the HandiRack.
Another paid option blends the first paid option with the DIY option I selected. This is the SportRack system, which uses foam cutouts and physical rack bars to make kayak storage easy. For this, you’ll just need SportRack bars, replacement foam, and straps. The foam is expandable so that it will accommodate most kayaks. Also, the underside has a non-skid surface so that your kayak doesn’t move around in transit.

![]()
These particular SportRack foam replacements won’t fit every type of crossbar system, so it’s essential to verify that the bars will slide into the cutout area.
Like the HandiRack system, this system is very easy to install – you merely feed the bars through the foam barring system and run a strap through the center of the metal. You tie the straps around the front and rear doors of your vehicle, and you’re ready to secure the kayak.
SportRack’s straps are designed to rest against the kayak without causing abrasions that can ruin the surface of the vessel. To secure it, you merely wrap the straps around the kayak and tighten them around the metal bar sections of the SportRack.
Advantages:
- The foam grips the top of your vehicle, thanks to a specialized surface.
- This foam will never lose memory.
Disadvantages:
- You have to have the right metal racks, or it won’t fit correctly.
Expensive Option
Sometimes, I tend to go kayaking with others, and when that happens, most atop-the-roof solutions won’t really work since most are only designed for a single kayak. Fortunately, this is where kayak trailers tend to stand out. While there are single kayak trailers on the market, you’ll also find that there are models for two to four kayaks, and many of these trailers have larger weight capacities, so you can use them for hauling larger items.

Kayak trailers are very beneficial when you’re out kayaking with the family, and they usually secure very easily to a ball hitch or other trailer systems that are compatible with many vehicles. That being said, not every vehicle can tow, so if you have no towing capacity or lack the hardware, you’re going to have to go with one of the roof systems that I outlined above. These trailers also tend to be very versatile – you can usually carry items like canoes, bikes, camping gear, or surfboards with relative easy, and their higher weight capacities adds a lot of utility.
Check out our kayak trailer page for a quick look at five kayak trailers that you may want to consider if you are without a roof racking system or if you need to bring multiple kayaks with you to your favorite body of water.
Advantages:
- With a kayak trailer, you can bring two to four kayaks.
- These can be used for other vehicles like canoes and bikes.
Disadvantages:
- You need a vehicle that can accommodate a trailer system.
How to Transport a Kayak without a Roof Rack
Now that you understand a little about the systems and some product options, let’s take a more in-depth look into some of the finer points of transporting your kayak.
Lifting the Kayak
Kayaks weigh between 20 and 90 pounds, so this can be a bit too heavy for some, especially if that someone is trying to heft the vessel onto the top of a tall vehicle. For this reason, it’s a good idea to have a system that you can use to lift your kayak onto your noodles, HandiRack, or SportRack. Fortunately, there are a couple of great ways to do this. Here are two to consider:
- Kayak Cart and Strap: Cover the top of your vehicle with a thick cloth, and let it drape over the rear so that your back window is protected. Using straps, hoist your kayak cart onto the rear of your vehicle and secure it there with the wheels facing outwards. Grab the front of your kayak and position it on the wheels so that the kayak is resting on the underside of the cart. Using the wheels to help, roll the kayak on top of the roof.
- The Blanket/Towel Method: Place your blanket, quilt, or large towel between your pool noodles or rack system. When placing it, it needs to be draping protectively over your side windows. With the bow of the kayak closest to the door, raise the stern end of the kayak until it rests against the door. Next, grab the kayak from the bow end, which should be on the bottom, and push it upwards using the side of the vehicle to provide you with the extra oomph you need to place the kayak atop your roof. This method works well because you don’t need a lot of extra upper body strength. You’re using the kayak as a lever and the car as a fulcrum to do a lot of the heavy lifting.
Placing the Kayak on the Platform
Placing the kayak atop of your car is something you’ll need to consider based on the securing system you’re using. Let’s take a look at each of the techniques/systems that we covered in the “What You Will Need Section.”
Noodles
With the noodle DIY system, the kayak will have to be placed so that the top portion is facing the roof of your car. This is because there is more surface area to contact with the pool noodles using this method. With more area making contact, your kayak has a reduced chance of slipping and moving as you ride to the body of water.
HandiRack
Similarly to the noodle method, with the HandiRack system, you’ll be placing the top half of the kayak so that it’s directly facing the top portion of your car. To secure the kayak, you’ll need the included straps, which you’ll be wrapping around the body of the kayak.
SportRack
Finally, the SportRack system works a little differently than the other two. For this method, you’ll be placing the downward portion of the kayak atop your car roof. This is because the SportRack system cradles the bottom of the kayak, which makes it an excellent system for keeping the kayak firmly in place without the need to worry about it shifting. The design of the SportRack ensures that the leading edge of the kayak nor its hull-side edge will touch the finish of your vehicle’s roof.
Securing the Kayak
As I mentioned, every kayak method used in this guide will require a strap, but utilizing some rope will also add some security. To strap the kayak in, you can use cam straps or ratcheting straps and tighten them to your preference. I like the ratcheting action of ratchet straps because it feels more secure, but straps that use a simple cam buckle system also work very well. SportRack uses a cam buckle system, and the underside of each cam buckle is designed to rest flush against either the kayak or your vehicle without scratching either.
Tying the Bow and Stern for Security
Sometimes, straps aren’t enough for you to feel secure while you’re driving with your kayak. To tie the kayak down, I typically use the grab handles on my kayak and the tow hooks at the base/front of the vehicle I’m using. Never attach tie-downs to plastic vehicle components – they should be metal. You can use loop straps if your car doesn’t have tow hooks. Just connect them using the bolt holes inside your hood area so that the loops remain exposed when you close the hood.
To secure the stern, find a secure point at the rear of the kayak. You can secure the other end of the strap to a tow point or using another loop strap that is attached to the rear door of your vehicle. Remember, when attaching the straps, leave a little bit of slack – never over-tighten.
Final Thoughts
Kayaking is a rewarding pastime that is great for the body, helps you commune with nature, and is a safe thing to do during social distancing. Once you use any of the systems I mentioned, it’ll be straightforward to head on out and go kayaking whenever you please.